
Automated testing is a key success factor when you develop mobile applications. In the Android ecosystem, the free Android Studio tool provides many useful features for apps developers. In this article, Nikolay Belousov explores how you can use Android Studio for software testing and explains how to retrieve logs.
Author: Nikolay Belousov, TestMatick, http://testmatick.com/
Application development is quite difficult and labor-consuming process that cannot be considered without such an important component as software testing. Android applications development is not an exception. This article presents the Android Studio tool and how to use it for mobile application testing.
What is Android Studio?
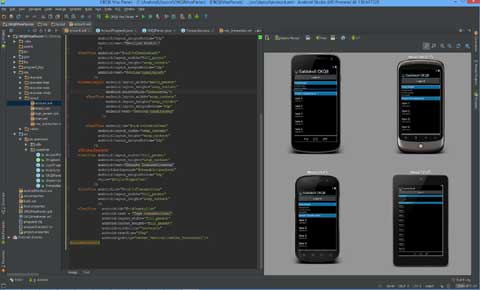
Android Studio is an official integrated Android application development environment (IDE), based on IntelliJ IDEA. This IDE allows to develop applications for any devices that uses the Android OS, such as smartphones, tablets, watches, glasses and so on. As a development tool, Android Studio has a rich set of features that can be used by software testers.
System requirements
Here is what the official website tells:
* Windows
– Microsoft® Windows® 8/7 / Vista / 2003 (32 or 64-bit)
– 2 GB of RAM minimum, 4 GB of RAM is recommended
– 400 MB on hard drive + at least 1 GB for Android SDK, system image emulator, and cashes
– 1280 x 800 minimum screen resolution
– Java Development Kit (JDK) 7
– In addition, to speed up the emulator: Intel® processor supporting Intel® VT- x , Intel® EM64T (Intel® 64 ) and Execute Disable (XD) Bit functionality
* Mac OS X
– Mac® OS X® 10.8.5 or higher, to 10,9 (Mavericks)
– 2 GB of RAM minimum, 4 GB of RAM is recommended
– 400 MB of free space on hard drive
– at least 1 GB for Android SDK, system image emulator, and cashes
– 1280 x 800 minimum screen resolution
– Java Runtime Environment (JRE) 6
– Java Development Kit (JDK) 7
– In addition, to speed up the emulator: Intel® processor supporting Intel® VT- x , Intel® EM64T (Intel® 64 ) and Execute Disable (XD) Bit functionality. In Mac OS, launch the Android- Studio with Java Runtime Environment (JRE) 6 to optimize the work with fonts. Then you can configure the project to using the Java Development Kit (JDK) 6 or JDK 7.
* Linux
– GNOME or KDE desktop
– The GNU C Library (glibc) 2.11 or later version
– 2 GB of RAM minimum, 4 GB of RAM is recommended
– 400 MB of free space on hard drive
– At least 1 GB for Android SDK, system image emulator
– 1280 x 800 minimum screen resolution
– Oracle® Java Development Kit (JDK) 7
Main Features of Android Studio
New functions appear with each new version of Android Studio. The following features can be considered as the most valuable:
- Extended layout editor: WYSIWYG, ability to work with UI components with the help of drag-and-drop, layout preview function on multiple configurations of the screen.
- Application build, based on Gradle.
- Various kinds of builds and generation of multiple .apk files.
- Code refactoring
- The static code analyzer (Lint), which allows finding performance problems, incompatibility of versions and so on.
- Inbuilt ProGuard and utility for application subscription.
- Templates of main layouts and Android components.
- Developing of applications for Android Wear and Android TV support.
- Inbuilt support of Google Cloud Platform, which includes integration with Google Cloud Messaging and App Engine services.
- Android Studio 2.1 supports Android N Preview SDK, and it means that the developers can start the creation of new software platform.
- The new version of Android Studio 2.1 is able to work with an updated compiler Jack, and it has gained an improved support for Java 8 and improved Instant Run feature.
- Platform-tools 23.1.0 for Linux became exclusively 64 -bit , even when you try to install the 32 – bit version . In other words, Android Studio is no longer working ( gives fatal errors ) in 32 – bit versions.
Installation
Before starting to use Android Studio, we need to download and install the following components:
- The JDK (Java Development Kit) is an application developer’s set for Java. The set includes compiler java (javak), standard libraries of java classes, documentation, examples, executive java system (JRE), as well as the various utilities. The Android Studio won’t work without JDK. The package must be downloaded in accordance with your operating system and its digit. The package is installed first. There is nothing complicated in this installation, just follow the instructions of the installer.
- The second component is Android Studio itself. There is also nothing difficult in the installation.
The workflow
One of the main product requirements is the possibility to review application’s logs, which can give more complete information about detected bugs/errors. Android Studio allows to do it, but there are some nuances:
- Be sure that there is USB debugging on the tested device.
- If your device will not be recognized after starting IDE, it would be necessary to update the drivers (it is especially important for Windows OS users).
Viewing logs
If everything is ready, start Android Studio and create a new project. Then connect your device to the PC with USB and tap “OK” on the device in “Debugging via USB” window. Actually, that is all.
An “Android monitor” bar is located in the lower part of IDE, there you can find the “logcat” tab, in which you can start tracking logs. Note that at the top of the panel there is a field to select the device currently connected to your PC .
There is also the menu on the “Android monitor” bar that allows to switch between the types of the displayed logs (Log level), so you can view all logs, or only those that describe certain states. A short explanation of each point of this menu:
* Verbose – to show all logs ( the default value).
* Debug – to show debug log messages
* Info – to show logs of constant use
* Warn – to show possible problems, which are not problems yet
* Error – to show the errors caused by problems
* Assert – to show problems that shouldn’t appear
Taking screenshots
One of the features of the “Android monitor” is taking screenshots in PNG format on the connected device or emulator. To take a screenshot press the button ![]() , after which the Screenshot Editor will be opened. That all that is necessary to know. You can edit and save the image in the majority of usual editors.
, after which the Screenshot Editor will be opened. That all that is necessary to know. You can edit and save the image in the majority of usual editors.
Recording video
“Android monitor” allows to record videos with the device for up to 3 minutes. This is analogous to taking screenshots. For opening recording window press ![]() and set the bit rate and resolution. Start and stop recording by pressing the corresponding start/stop recording buttons.
and set the bit rate and resolution. Start and stop recording by pressing the corresponding start/stop recording buttons.
Testing in Android Studio
Besides the basic functions for detecting bugs Android Studio provides a comprehensive framework, which will validate all aspects of your application. The platform includes tools and API for setting and launching testing application in emulator or real device. Android Studio supports a large range for automated testing tools. You can find more information about the principles of testing in Android Studio on the tool web site.
Comparison with competitors
Before exploring Android Studio I didn’t have an opportunity to deal with similar IDE, except for Eclipse, that’s why I can hardly compare objectively, and you can find comparison in the Internet.
Personal impressions
Android Studio is a powerful and user-friendly tool with nice design made for Android platform, which is, in my opinion, its main advantage and disadvantage. It works quickly, at least I haven’t faced any problems. The important fact, that the product is based on IntelliJ IDEA, I worked with JetBrains products before, they are always at the top.
Summary
Android studio is a great tool for everyday use for a tester who performs manual and automated software testing as a service of Android applications. This IDE includes many functionality, beginning with simple things like taking screenshot up to writing and executing automated tests. The application is free and is quite often updated.
About the author
Nikolay Belousov is senior mobile tester for TestMatick. He is experienced in evaluation of SQA tools and administration of those tools.